I
Primeros pasosFirst steps
La historia en 30 segundosThe story in 30 seconds
Hace 312 años un emperador intentó traer de vuelta a su hija muerta, y desde esa noche nadie puede morir del todo. Las almas que no se van poseen bestias, levantan muertos y, cuando se juntan miles, forman Colosos gigantes.312 years ago an emperor tried to bring his dead daughter back, and since that night no one can fully die. The souls that don't leave possess beasts, raise the dead and, when thousands gather, form giant Colossi.
Vos sos un Sin Ocaso: moriste y volviste junto a un Faro, sin recordar quién eras. Cada vez que caés, volvés a un Faro.You are one of the Duskless: you died and came back beside a Beacon, with no memory of who you were. Every time you fall, you come back at a Beacon.
Elegí tu claseChoose your class
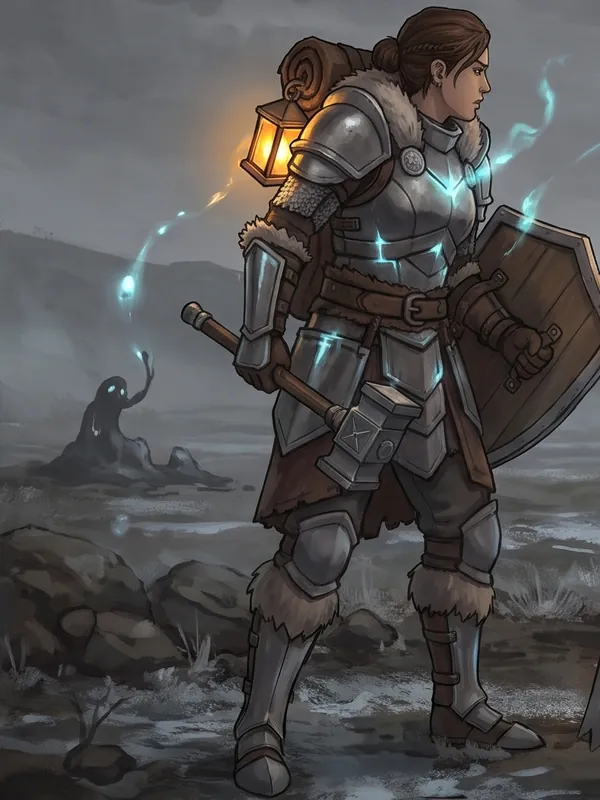
GuerreroWarrior
JuramentadoOathsworn
Arma y escudo, al frente. Golpes con arma, aturdimientos, gritos y guardias que aguantan lo que venga. Su entrenador es el Capitán Sorel, en el Cuartel; su equipo lo vende la Herrería de Bram.Weapon and shield, up front. Weapon strikes, stuns, shouts and guards that take whatever comes. His trainer is Captain Sorel, in the Barracks; his gear is sold at Bram's Smithy.
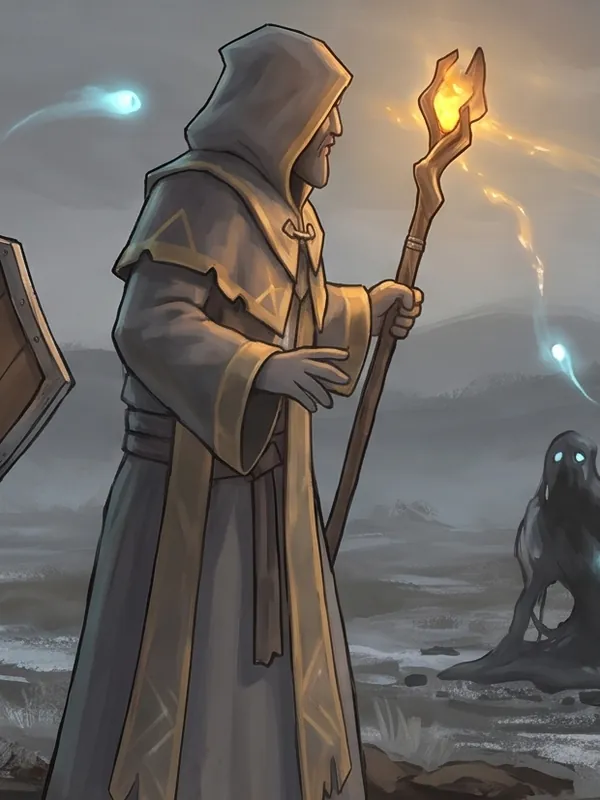
MagoMage
AurimanteAuromancer
Teje la luz del alba desde lejos: fuego, escarcha, curación y escudos. Su entrenadora es Vela, en la Torre del Alba, donde ella e Iris venden su equipo.Weaves the light of dawn from afar: fire, frost, healing and wards. His trainer is Vela, in the Dawn Tower, where she and Iris sell his gear.
Tu primera nocheYour first night
- Despertás en Lumbrera, junto al Faro Mayor. El pueblo es zona segura: adentro se camina y no se pelea. Con un personaje nuevo te ofrece el tutorial (recomendado): te muestra la pantalla de a una parte por vez.You wake in Lumbrera, beside the Great Beacon. The town is a safe zone: you walk and nobody fights there. A new character is offered the tutorial (recommended): it shows you the screen one part at a time.
- Hablá con la Hermana Maren, en la Tienda del Faro. Empezás a puño, con 50 de oro y 3 pociones de vida (el Aurimante, también 2 de maná): alcanza para tu primera arma (20 de oro, en la Herrería o en la Torre del Alba) y una o dos pociones (15 cada una).Talk to Sister Maren, in the Beacon Shop. You start bare-handed, with 50 gold and 3 health potions (the Auromancer also gets 2 mana potions): enough for your first weapon (20 gold, at the Smithy or the Dawn Tower) and a potion or two (15 each).
- Salí a cazar. Cruzá el Puente Viejo hacia los Campos Grises: junto al puente están los Lodos de Ánima (nivel 1–2), los más fáciles. Más al oeste, por el molino, los Labriegos Huecos (3–5).Go hunting. Cross the Old Bridge into the Gray Fields: by the bridge are the Anima Oozes (level 1–2), the easiest. Further west, by the mill, the Hollow Farmhands (3–5).
- Juntá sus almas. Cada monstruo suelta un orbe azul: pasá cerca y va a tu farol. La mayor parte de la experiencia viaja en las almas.Collect their souls. Every monster drops a blue orb: walk past it and it flies into your lantern. Most of the experience travels in the souls.
- Entregalas a un Farolero (Guiar las almas): te pagan la experiencia y algo de oro. Subís de nivel, comprás mejor equipo y te alejás un poco más del pueblo.Hand them to a Lampwarden (Guide the souls): you get the experience and some gold. You level up, buy better gear and venture a little further from town.
Dónde cazarWhere to hunt
Cuanto más lejos del pueblo, más duros los monstruos y más almas dan.The further from town, the tougher the monsters and the more souls they give.
| ZonaZone | NivelesLevels | Qué vas a encontrarWhat you'll find |
|---|
| Campos GrisesGray Fields | NivelesLevels1–5 | Lodos de Ánima, Labriegos HuecosAnima Oozes, Hollow Farmhands |
| Bosque de las VocesForest of Voices | NivelesLevels4–8 | Lobos Susurrantes, Ecos ErrantesWhispering Wolves, Wandering Echoes |
| Lomas de CenizaAshen Hills | NivelesLevels5–10 | Lobos, Ecos Errantes, Soñadores Acólitos (en el cementerio)Wolves, Wandering Echoes, Dreamer Acolytes (in the cemetery) |
| Ruinas de VigiliaVigil Ruins | NivelesLevels8–12 | Huecos Legionarios y Ballesteros, el Comandante VarekHollow Legionaries and Crossbowmen, Commander Varek |
| Hondonada de los MilHollow of the Thousand | NivelesLevels12–15 | Ecos de los Mil, LisandroEchoes of the Thousand, Lisandro |
Leer los coloresReading the colors
- El nombre del monstruo: rojo o naranja es peligroso (y da más XP), amarillo es de tu nivel, verde es fácil (da poca) y gris ya no te da nada.A monster's name: red or orange is dangerous (and gives more XP), yellow is your level, green is easy (gives little) and gray gives you nothing anymore.
- El nombre de un NPC: azul con un almita es un Farolero (guía tus almas y te lleva de Faro en Faro); verde con una moneda, un comerciante; dorado, alguien con quien hablar (misiones, guías, entrenadores); cobre, un élite (un monstruo con nombre, más duro); gris, un vecino.An NPC's name: blue with a little soul is a Lampwarden (guides your souls and takes you from Beacon to Beacon); green with a coin, a merchant; gold, someone to talk to (quests, guides, trainers); copper, an elite (a named, tougher monster); gray, a villager.
CuentaAccount
- Entrá con Google o Discord (un toque, sin contraseña) o creá una cuenta con tu mail. Hasta 4 personajes; todo se guarda solo, al salir y cada minuto.Sign in with Google or Discord (one tap, no password) or create an account with your email. Up to 4 characters; everything saves on its own, when you leave and every minute.
- Si se corta internet, el juego reconecta solo y tu personaje te espera 30 segundos donde estaba.If your connection drops, the game reconnects on its own and your character waits 30 seconds where it was.
- Si pasás 60 minutos sin tocar nada, te desconecta (un minuto antes avisa: con tocar cualquier cosa te quedás).After 60 minutes without touching anything, it signs you out (it warns you a minute before: touch anything to stay).
- El oro del Almacén es de la cuenta: lo comparten tus personajes.The Guild Vault's gold belongs to your account: all your characters share it.
II
ControlesControls
Se juega con mouse y teclado, y anda bien en notebook: no hace falta el click derecho (todo lo que hace está también en D). Todas las teclas, salvo Enter y Esc, se cambian en Esc → Opciones → Controles.You play with mouse and keyboard, and it plays well on a laptop: you don't need right click (everything it does is also under D). Every key except Enter and Esc can be changed in Esc → Options → Controls.
Moverse y pelearMoving and fighting
| TeclaKey | Qué haceWhat it does |
|---|
| Click en el pisoon the ground | Moverse (mantené apretado para seguir al mouse). En el pueblo se camina; afuera se corre.Move (hold it to follow the mouse). In town you walk; outside you run. |
|---|
| Click en un monstruoon a monster | Atacar. Mantenelo apretado y seguís pegando, también al que pase bajo el mouse. El click derecho no ataca.Attack. Hold it and you keep hitting, also whoever passes under the mouse. Right click doesn't attack. |
|---|
| Shift + Click | Atacar sin moverte: no corrés hacia el enemigo ni al piso si le errás (agarra el más cercano al click). Ideal para Aurimantes.Attack without moving: you don't run to the enemy, or to the ground if you miss (it takes the one nearest the click). Made for Auromancers. |
|---|
| Tab | Seleccionar enemigo.Select an enemy. |
|---|
| 1–7 | Poderes (1 es el ataque básico). En la ciudad no se usan.Powers (1 is the basic attack). Not usable in town. |
|---|
| 8 · 9 | Poción de vida · poción de maná (comparten la espera).Health potion · mana potion (they share their cooldown). |
|---|
| 0 | Pergamino de Retorno. Podés arrastrar cualquier poción, aura o pergamino de la mochila a las casillas 8, 9 y 0.Return Scroll. You can drag any potion, aura or scroll from the bag onto slots 8, 9 and 0. |
|---|
| EspacioSpace | Agarra todo lo que hay a tu alrededor (hasta 4 m) de una, sin caminar. También podés hacer click en lo que cayó.Picks up everything around you (up to 4 m) at once, without walking. You can also click what dropped. |
|---|
| F | Hablar con el NPC más cercano (hasta 15 m). O click sobre él.Talk to the nearest NPC (up to 15 m). Or click them. |
|---|
| Rueda del mouseMouse wheel | Zoom de la cámara, de cerca a unos 25 m (la cámara mira siempre al norte).Camera zoom, from close up to about 25 m (the camera always faces north). |
|---|
VentanasWindows
| TeclaKey | Qué abreWhat it opens |
|---|
| I / V | Mochila y equipo, con tus atributos y tu historial.Bag and equipment, with your attributes and your record. |
|---|
| K | Libro de poderes: arrastrá los que quieras a las casillas 2–7. Un puntito avisa cuando aprendiste uno nuevo.Book of powers: drag the ones you want onto slots 2–7. A little dot tells you when you learned a new one. |
|---|
| N | Constelación del Alma: con cada nivel ganás un punto para estrellas pasivas.Constellation of the Soul: every level gives you a point for passive stars. |
|---|
| M | Mapa grande (o click en el minimapa): zoom con la rueda, arrastrá para moverte, filtros a la derecha y el evento del mundo.Big map (or click the minimap): wheel to zoom, drag to move, filters on the right and the world event. |
|---|
| Click derecho en el mapaRight click on the map | Tu personaje camina solo hasta ahí siguiendo la ruta (se corta si hacés click en el mundo o atacás).Your character walks there on its own along the road (clicking the world or attacking stops it). |
|---|
| D | Comandos de jugador: Comerciar, Ver equipo, Invitar al grupo, Susurrar. Elegí uno y hacé click en el jugador. Click derecho sobre un jugador abre lo mismo.Player commands: Trade, See equipment, Invite to party, Whisper. Pick one and click the player. Right-clicking a player opens the same. |
|---|
| Esc | Menú: Opciones (Juego, Gráficos, Experimental, Sonido, Interfaz, Accesibilidad y Controles), cambiar de personaje y cerrar sesión.Menu: Options (Game, Graphics, Experimental, Sound, Interface, Accessibility and Controls), switch character and sign out. |
|---|
ChatChat
| TeclaKey | Qué haceWhat it does |
|---|
| Enter | Abre el chat. Dos pestañas: Cercano (lo leen los que están a menos de 30 m, con un globito arriba tuyo) y General (toda la instancia, con lo dicho en los últimos 10 minutos).Opens the chat. Two tabs: Nearby (read by those within 30 m, with a bubble above you) and General (the whole instance, with what was said in the last 10 minutes). |
|---|
| Tab escribiendowhile typing | Pasa a la otra pestaña, al Grupo, a los últimos 5 con quienes susurraste y a Susurro nuevo (Shift+Tab para atrás).Switches to the other tab, to Party, to the last 5 people you whispered and to New whisper (Shift+Tab goes back). |
|---|
/w nombrename | Susurrar: solo lo lee esa persona (sale en rosa). También con click en un nombre del chat.Whisper: only that person reads it (shown in pink). Also by clicking a name in the chat. |
|---|
R · /r | Responderle a quien te susurró último.Reply to whoever whispered you last. |
|---|
/p | Hablar solo con tu grupo (en verde).Talk only to your party (in green). |
|---|
/ayuda · ? | La lista de todo lo que se puede escribir.The list of everything you can type. |
|---|
Bueno saberGood to know
- Todo se juega con teclado. En una ventana abierta, Tab entra y las flechas se mueven por las casillas. En la mochila: Enter usa o equipa, Espacio levanta y suelta un ítem, Supr lo tira y S lo vende en una tienda abierta.Everything plays with the keyboard. In an open window, Tab enters it and the arrows move through its slots. In the bag: Enter uses or equips, Space lifts and drops an item, Del throws it away and S sells it at an open shop.
- Pantalla completa: al apretar Jugar el juego ocupa toda la pantalla. Para salir, mantené Esc apretado. Se apaga en Opciones → Juego.Fullscreen: pressing Play makes the game fill the screen. To leave it, hold Esc. Turn it off in Options → Game.
- El cursor te dice qué hace el click: una espada sobre un enemigo, un globito sobre alguien con quien hablar, una mano abierta sobre algo para agarrar, un libro sobre un objeto de misión, una llave sobre tu cofre de invasión, un farol sobre un portal.The cursor tells you what a click does: a sword over an enemy, a speech bubble over someone to talk to, an open hand over something to pick up, a book over a quest object, a key over your invasion chest, a lantern over a portal.
- Encontrar a un NPC entre la gente: pasá el mouse por encima y se ilumina un aro dorado a sus pies. Los nombres de los NPC quedan siempre encima de los de los jugadores.Finding an NPC in a crowd: hover them and a golden ring lights up at their feet. NPC names always sit above players' names.
III
Combate y poderesCombat and powers
Cómo se peleaHow fighting works
- Click sobre un monstruo para atacarlo; 1–7 para tus poderes. Con Shift apretado atacás sin moverte del lugar.Click a monster to attack it; 1–7 for your powers. Hold Shift to attack without moving.
- Los Lodos y los Labriegos son tranquilos, pero si te les pegás mucho (2–3 m) o les pegás, atacan. Los Lobos te ven desde lejos y vienen.Oozes and Farmhands are calm, but if you get too close (2–3 m) or hit them, they attack. Wolves spot you from afar and come for you.
- Si volvés al pueblo, o te alejás unos segundos sin pelear, dejan de perseguirte y vuelven a su lugar.If you go back to town, or move away for a few seconds without fighting, they stop chasing you and go back to their spot.
- La vida se recupera sola después de unos segundos sin pelear, y mucho más rápido dentro del pueblo.Health comes back on its own after a few seconds out of combat, and much faster in town.
- Si peleás con otros jugadores (aunque no sean de tu grupo), cada uno se lleva XP según el daño que hizo, con un bonus por pelear juntos, y cada uno recibe su propio orbe de alma.If you fight alongside other players (even outside a party), each one gets XP for the damage they did, with a bonus for fighting together, and each gets their own soul orb.
El maná se cuidaMind your mana
Cada poder cuesta una parte de tu maná (sube con tu nivel; el maná del equipo te da tiradas de más). Si tirás todo junto, te alcanza para una vez y quedás seco: peleando, el maná vuelve muy despacio, y rápido recién cuando terminás (o en el pueblo). Tu primer poder solo, en cambio, lo podés tirar seguido un buen rato. La poción de maná chica te devuelve un tercio.Every power costs a share of your mana (it grows with your level; mana on your gear buys extra casts). Fire everything at once and you get one round before you run dry: in a fight mana comes back very slowly, and quickly only once it's over (or in town). Your first power alone, though, you can cast over and over for a good while. A minor mana potion gives back a third.
EntrenadoresTrainers
Cada clase empieza con un poder (Golpe Brutal o Bola de Fuego) y aprende los demás con su entrenador, pagando oro (de 60 a 5.200): el Capitán Sorel en el Cuartel (Juramentados) y Vela en la Torre del Alba (Aurimantes). En la barra los ves con candado y el nivel que piden. Pasando el mouse por un poder ves qué hace, su maná, su recarga y por qué no se puede usar todavía.Each class starts with one power (Brutal Strike or Fireball) and learns the rest from its trainer, for gold (from 60 to 5,200): Captain Sorel in the Barracks (Oathsworn) and Vela in the Dawn Tower (Auromancers). On the bar they show a padlock and the level they need. Hover a power to see what it does, its mana, its cooldown and why you can't use it yet.
Los golpes con arma necesitan un arma en la mano: Golpe Brutal, Torbellino, Tajo Sísmico, Castigo y Martillo del Alba. A puño su casilla dice sin arma. Los demás poderes del Juramentado y todos los del Aurimante se usan sin arma.Weapon strikes need a weapon in hand: Brutal Strike, Whirlwind, Seismic Slash, Punish and Dawn Hammer. Bare-handed their slot reads no weapon. The Oathsworn's other powers and all of the Auromancer's work without one.
Poderes apuntados: el Salto del Juramento y el Paso del Velo dibujan un círculo en el piso: hacé click donde querés ir (click derecho o Esc cancelan). En el aire no podés tirar nada.Aimed powers: Leap of the Oath and Veil Step draw a circle on the ground: click where you want to go (right click or Esc cancel). You can't cast anything mid-air.
Poderes del JuramentadoOathsworn powers
Golpe BrutalBrutal Strike
Nivel 1 · 5 sLevel 1 · 5 s
Tajo corto: 160% a tu enemigo y 80% a hasta 2 pegados delante tuyo.Short slash: 160% to your enemy and 80% to up to 2 right in front of you.
TorbellinoWhirlwind
Nivel 3 · 8 sLevel 3 · 8 s
Girás con el arma: 110% a todos a 3,5 m.You spin: 110% to everyone within 3.5 m.
Golpe de EscudoShield Bash
Nivel 5 · 12 sLevel 5 · 12 s
120% a los pies del enemigo y 2 s aturdidos a todos alrededor.120% at your enemy's feet and 2 s stunned for everyone around.
Salto del JuramentoLeap of the Oath
Nivel 6 · 14 sLevel 6 · 14 s
Saltás hasta 14 m: al caer, 120% y 1 s de aturdimiento. Para entrar o salir de una pelea.Leap up to 14 m: landing, 120% and a 1 s stun. To get into a fight, or out of one.
QuiebratierraEarthshatter
Nivel 7 · 13 sLevel 7 · 13 s
120% a 4,5 m, medio segundo de aturdimiento y dos réplicas de 45%.120% within 4.5 m, a half-second stun and two 45% aftershocks.
Escudo JuramentadoOath Guard
Nivel 8 · 25 sLevel 8 · 25 s
Recibís la mitad del daño durante 5 s.Take half damage for 5 s.
Grito de GuerraWar Cry
Nivel 10 · 20 sLevel 10 · 20 s
90% a todos a 5 m y +20% de daño y velocidad de ataque por 8 s.90% to everyone within 5 m and +20% damage and attack speed for 8 s.
CastigoPunish
Nivel 11 · 9 sLevel 11 · 9 s
150% a un enemigo, el doble si está aturdido.150% to one enemy, double if it's stunned.
Tajo SísmicoSeismic Slash
Nivel 13 · 14 sLevel 13 · 14 s
180% a todos a 3 m del enemigo.180% to everyone within 3 m of your enemy.
EmbestidaCharge
Nivel 15 · 15 sLevel 15 · 15 s
Corrés contra un enemigo a hasta 16 m y lo aturdís 1,5 s.Rush an enemy up to 16 m away and stun it for 1.5 s.
BaluarteBulwark
Nivel 18 · 30 sLevel 18 · 30 s
70% menos daño durante 4 s.70% less damage for 4 s.
Martillo del AlbaDawn Hammer
Nivel 22 · 18 sLevel 22 · 18 s
220% a todos a 4,5 m del enemigo, aturdidos 1 s.220% to everyone within 4.5 m of your enemy, stunned 1 s.
Juramento InquebrantableUnbroken Oath
Nivel 26 · 40 sLevel 26 · 40 s
Recuperás el 35% de la vida.Recover 35% of your health.
Poderes del AurimanteAuromancer powers
Bola de FuegoFireball
Nivel 1 · 3,5 sLevel 1 · 3.5 s
Desde hasta 18 m: 200% cuando llega.From up to 18 m: 200% when it lands.
Nova de EscarchaFrost Nova
Nivel 3 · 10 sLevel 3 · 10 s
90% a todos a 4,5 m, congelados 1,5 s.90% to everyone within 4.5 m, frozen 1.5 s.
Lumbre CurativaHealing Glow
Nivel 5 · 15 sLevel 5 · 15 s
Recuperás el 30% de la vida.Heal 30% of your health.
Paso del VeloVeil Step
Nivel 6 · 12 sLevel 6 · 12 s
Aparecés hasta 12 m más allá: al llegar, 100% a 3 m.Reappear up to 12 m away: arriving, 100% within 3 m.
Lluvia del AlbaDawn Rain
Nivel 8 · 9 sLevel 8 · 9 s
Chispas durante 3 s donde está el enemigo: 160% en total a 4 m, también a los que entran.Sparks for 3 s where your enemy stands: 160% in all within 4 m, also to those who walk in.
Escudo ArcanoArcane Ward
Nivel 10 · 25 sLevel 10 · 25 s
40% menos daño y +15% de velocidad de ataque por 6 s.40% less damage and +15% attack speed for 6 s.
Quiebre de EscarchaFrost Shatter
Nivel 11 · 8 sLevel 11 · 8 s
160% a un enemigo, el doble si está congelado.160% to one enemy, double if it's frozen.
Lanza SolarSolar Lance
Nivel 13 · 12 sLevel 13 · 12 s
320% a un enemigo.320% to one enemy.
Cadena de LuzChain of Light
Nivel 15 · 10 sLevel 15 · 10 s
130% al primero y salta a 2 más.130% to the first and leaps to 2 more.
Velo InvernalWinter Veil
Nivel 18 · 22 sLevel 18 · 22 s
100% a todos a 6 m, congelados 2,5 s.100% to everyone within 6 m, frozen 2.5 s.
Meteoro del AlbaDawn Meteor
Nivel 22 · 20 sLevel 22 · 20 s
260% a todos a 5 m del enemigo.260% to everyone within 5 m of your enemy.
Sol NacienteRising Sun
Nivel 26 · 24 sLevel 26 · 24 s
Dos estallidos de 90% a 5 m, ceguera de 1 s y +25% de velocidad de ataque por 8 s.Two 90% bursts within 5 m, a 1 s blind and +25% attack speed for 8 s.
El porcentaje es del daño de tu arma; el tiempo, la recarga.Percentages are of your weapon damage; the time is the cooldown.
AurasAuras
Se compran en la tienda de tu clase (la Herrería para Juramentados, la Torre del Alba para Aurimantes) y con Lira, la juglar de la taberna. Se toman como una poción y durante 10 minutos te dan un poco más de daño, vida, defensa o maná (una por vez). Mientras dura, un orbe de tu color te da vueltas.Sold at your class's shop (the Smithy for the Oathsworn, the Dawn Tower for Auromancers) and by Lira, the bard at the tavern. You drink one like a potion and for 10 minutes it gives you a little more damage, health, defense or mana (one at a time). While it lasts, an orb in your color circles you.
Constelación del AlmaConstellation of the Soul
Cada nivel te da un punto (N) para estrellas pasivas: más daño, más vida, menos maná o recarga, orbes que te dan vueltas. Se aprende una estrella unida a otra que ya tengas.Every level gives you a point (N) for passive stars: more damage, more health, less mana or cooldown, orbs that circle you. You learn a star linked to one you already have.
IV
Equipo e inventarioGear and inventory
La mochilaThe bag
- 40 lugares; cada ítem ocupa uno y las pociones se apilan. Arrastrá para mover o equipar; doble click para equipar, sacar o usar.40 slots; each item takes one and potions stack. Drag to move or equip; double-click to equip, unequip or use.
- Al arrastrar, los lugares de equipo donde entra se marcan en verde; en rojo, no es de tu clase o te falta nivel.While dragging, the equipment slots it fits light up green; red means it's not your class or you're under its level.
- Pasá el mouse por una pieza y te dice cuánto mejora o empeora contra lo que tenés puesto.Hover a piece and it tells you how much better or worse it is than what you're wearing.
- Para tirar algo, arrastralo afuera, al mundo: queda en el piso 3 minutos, para cualquiera.To throw something away, drag it out into the world: it stays on the ground for 3 minutes, for anyone.
- La pestaña Historial cuenta cuánto jugaste, tus muertes, los jefes que venciste, el oro ganado y gastado y lo que más cazaste.The Record tab counts how long you've played, your deaths, the bosses you beat, the gold earned and spent and what you hunted most.
RarezaRarity
- ComúnCommongris · lo dejan los monstruosgray · dropped by monsters
- Normalceleste · tiendas y, a veces, monstruoslight blue · shops and, sometimes, monsters
- RaroRarevioleta · jefes y élitespurple · bosses and elites
- LegendarioLegendarynaranja · los grandes jefesorange · the great bosses
En el piso, lo más valioso brilla más: las gemas pulidas, lo raro y lo legendario mandan una columna de luz al cielo que se ve de lejos.On the ground, the more valuable it is the brighter it shines: polished gems, rares and legendaries send a column of light into the sky you can see from afar.
DropsDrops
- A veces un monstruo deja algo en el piso: una poción, un Fragmento de Ánima, una gema (desde el nivel 4 astilladas, desde el 8 también pulidas) o equipo gastado de los caídos, más flojo que el de las tiendas (sirve para arrancar o para vender).Sometimes a monster leaves something on the ground: a potion, an Anima Shard, a gem (chipped from level 4, polished too from level 8) or worn gear from the fallen, weaker than shop gear (good to start with or to sell).
- Es tuyo 2 minutos si lo mataste vos (en gris, es de otro); después lo puede agarrar cualquiera, y a los 3 minutos desaparece.It's yours for 2 minutes if you made the kill (gray means it's someone else's); after that anyone can take it, and after 3 minutes it vanishes.
- Con Opciones → Juego → Juntar oro solo, el oro de tus presas entra a tu bolsa cuando pasás cerca.With Options → Game → Auto-collect gold, your kills' gold goes into your bag as you walk past.
GuardarropasWardrobes
En la taberna, el Cuartel, la Torre del Alba, el Almacén, la Tienda del Faro y el Cuartel imperial de las Ruinas, con un círculo de luz dorada delante. Es el mismo guardarropa en todos lados: 3 baúles de 40 lugares (el primero gratis, el segundo 5.000 de oro, el tercero 20.000). Doble click en una pieza del baúl te la pone directo.In the tavern, the Barracks, the Dawn Tower, the Guild Vault, the Beacon Shop and the Imperial Barracks in the Ruins, with a circle of golden light in front. It's the same wardrobe everywhere: 3 chests of 40 slots (the first free, the second 5,000 gold, the third 20,000). Double-click a piece in the chest to put it on directly.
SetsSets
Muchas piezas son parte de un set: con 2, 4, 6 y 8 puestas ganás un bono más (todo en la Guía de sets) (el cuadro del ítem te muestra cuáles tenés y qué bonos están activos). Todo lo que tenés puesto se ve en tu personaje, y con el set entero aparece un círculo de luz a tus pies del color de su rareza.Many pieces belong to a set: wearing 2, 4, 6 and 8 of them gives you one more bonus each time (all in the Sets guide) (the item's tooltip shows which you have and which bonuses are active). Everything you wear shows on your character, and with the full set a circle of light in its rarity's color appears at your feet.
Templar en la forjaTempering at the forge
Bram (Herrería) e Iris (Torre del Alba) templan cualquier pieza en su pestaña Forjar, de +1 a +9: cada nivel la hace más fuerte.Bram (Smithy) and Iris (Dawn Tower) temper any piece in their Forge tab, from +1 to +9: every level makes it stronger.
- Hasta +3 alcanza con oro y Fragmentos de Ánima.Up to +3 you only need gold and Anima Shards.
- Desde +4 pide gemas y puede fallar: si falla, solo perdés las gemas. Desde +4 la pieza brilla; desde +7 le corre energía y echa humo dorado; en +9 se vuelve azul de ánima.From +4 it takes gems and can fail: if it does, you only lose the gems. From +4 the piece glows; from +7 energy runs through it and it smokes gold; at +9 it turns anima blue.
- Para +7 y +9 hacen falta gemas perfectas, y el Ánima del Coro (solo la deja Ossaria) para +9.+7 and +9 need flawless gems, and Anima of the Choir (only Ossaria drops it) for +9.
- Las piezas Legendarias piden el triple de oro, el doble de Fragmentos y de gemas, y fallan más.Legendary pieces cost triple the gold, double the Shards and gems, and fail more often.
- Los Fragmentos de Ánima salen de vender almas a Bram (1 cada 4 almas) y de los monstruos.Anima Shards come from selling souls to Bram (1 per 4 souls) and from monsters.
GemasGems
GranateGarnetvida y recargahealth and cooldown
ZafiroSapphiremaná y recargamana and cooldown
ÁmbarAmberdaño y vel. de ataquedamage and attack speed
ÓnixOnyxdefensa y vidadefense and health
Cada una viene astillada, pulida o perfecta. Sirven para templar y para incrustar. En el piso brillan del color de su piedra.Each comes chipped, polished or flawless. They're used for tempering and for socketing. On the ground they shine in their stone's color.
En el mercadoAt the market
Ilario, el OrfebreIlario, the Jeweler
Talla 3 gemas iguales en una de la calidad siguiente. Su puesto tiene toldo ciruela y una vitrina de gemas; en los mapas es una gema verde agua.Cuts 3 identical gems into one of the next quality. His stall has a plum awning and a gem case; on the maps he's a teal gem.
Al lado de IlarioNext to Ilario
Nerea, la JoyeraNerea, the Gemsetter
Incrusta una gema en la pieza que quieras: le suma sus atributos (una nueva reemplaza a la anterior). En Desincrustar te la saca entera por 400 / 900 / 2.000 de oro y 15 / 25 / 40 Fragmentos, según la calidad. Su misión Una joya en el acero (nivel 4) te regala la primera.Sockets a gem into the piece you choose: it adds its stats (a new one replaces the old). Under Remove Gems she takes it out whole for 400 / 900 / 2,000 gold and 15 / 25 / 40 Shards, by quality. Her quest A Gem in the Steel (level 4) gives you your first.
PocionesPotions
- Chicas (vida o maná): 15 de oro, devuelven el 35%. Las venden Odile y Nilo en la Botica, Maren, Ilse y todas las casas del valle.Minor (health or mana): 15 gold, restore 35%. Sold by Odile and Nilo at the Apothecary, Maren, Ilse and every house out in the vale.
- En la pestaña Destilar de Odile: 3 chicas + 20 de oro hacen una mediana (55%, 11 s de espera), y 3 medianas + 60 de oro una mayor (80%, 15 s), que solo se consigue así.In Odile's Distill tab: 3 minor + 20 gold make a medium one (55%, 11 s cooldown), and 3 medium + 60 gold a greater one (80%, 15 s), which you can only get this way.
- Todas las de vida comparten la espera, y las de maná también.All health potions share their cooldown, and so do all mana potions.
V
Guía de setsSets guide
Qué ponerte en cada nivel, de dónde sale cada set y cómo hacerlo más fuerte templándolo e incrustándole gemas.What to wear at each level, where every set comes from and how to make it stronger by tempering it and socketing gems.
Cada ítem del juego, con sus stats y qué monstruo, jefe o tienda lo da (y cada cuánto), en la guía de ítems y la guía de loot.Every item in the game, with its stats and which monster, boss or shop gives it (and how often), in the items guide and the loot guide.
Cómo funciona un setHow a set works
- Cada set tiene 8 piezas: casco, pecho, guantes, botas, piernas, capa, arma y escudo o foco.Every set has 8 pieces: helm, chest, gloves, boots, legs, cloak, weapon and shield or focus.
- Con 2, 4, 6 y 8 piezas puestas se suma un bono más cada vez. Pasá el mouse por una pieza: el cuadro te dice cuántas tenés y qué bonos están encendidos.With 2, 4, 6 and 8 pieces on, one more bonus adds up each time. Hover a piece: the tooltip tells you how many you wear and which bonuses are lit.
- Cada set tiene un papel (tanque, ráfagas, moverse, contra jefes…) y casi todos tienen un precio en rojo: no siempre el más nuevo es el mejor; elegí el que sirve para lo que vas a hacer.Every set has a role (tank, bursts, moving, against bosses…) and almost all have a price in red: the newest isn't always the best; pick the one that suits what you're about to do.
- Podés mezclar piezas de sets distintos; al cambiar una, el cuadro te muestra en rojo los bonos que perdés y en verde los que ganás.You can mix pieces of different sets; when you swap one, the tooltip shows in red the bonuses you lose and in green the ones you gain.
- Con el set entero aparece un círculo de luz a tus pies del color de su rareza.With the full set, a circle of light in its rarity's color appears at your feet.
Tu camino de equipoYour gear path
- Nivel 1–3: arrancás sin equipo; con lo de tus primeras almas comprás el arma (20 de oro) y las piezas del set inicial de tu clase (Recluta de Hierro o Iniciado de Ceniza).Level 1–3: you start with no gear; with your first souls' gold you buy the weapon (20 gold) and the pieces of your class's starter set (Iron Recruit or Ash Initiate).
- Nivel 4–6: comprá el set Normal de tu clase en el pueblo (Bram para el Juramentado, Vela para el Aurimante).Level 4–6: buy your class's Normal set in town (Bram for the Oathsworn, Vela for the Auromancer).
- Nivel 5–8: lo Común que cae en el Bosque y las Lomas te da otra opción gratis.Level 5–8: the Common gear that drops in the Forest and the Hills gives you another free option.
- Nivel 9–12: los buhoneros Odo (Ruinas) y Sabina (Hondonada) venden el set para moverse; Varek, en las Ruinas, deja el Raro de cañón de cristal.Level 9–12: the peddlers Odo (Ruins) and Sabina (Hollow) sell the set for moving; Varek, in the Ruins, drops the glass-cannon Rare.
- Nivel 13–15: pelear a Ossaria con el pueblo: cada uno que la pelea se lleva equipo Raro y, en sus despertares más fuertes, Legendario.Level 13–15: fight Ossaria with the town: everyone who fights her takes Rare gear and, on her stronger awakenings, Legendary.
Sets del JuramentadoOathsworn sets
| SetSet | NivelLevel | RarezaRarity | DóndeWhere | Para quéWhat for |
|---|
| Recluta de HierroIron Recruit | NivelLevel1–3 | RarezaRarityNormalNormal | DóndeWhereBram, Tilo y Brenda (Herrería)Bram, Tilo and Brenda (Smithy) | Para quéWhat forPara arrancarTo start |
| Guardia de LumbreraLumbrera Watch | NivelLevel4–6 | RarezaRarityNormalNormal | DóndeWhereBram, Tilo y Brenda (Herrería)Bram, Tilo and Brenda (Smithy) | Para quéWhat forAguantar la línea: guardia y regeneraciónHolding the line: guard and regeneration |
| Milicia CaídaFallen Militia | NivelLevel5–8 | RarezaRarityComúnCommon | DóndeWhereMonstruos del Bosque y las LomasMonsters of the Forest and the Hills | Para quéWhat forPegar fuerte: crítico; menos defensaHitting hard: crits; less defense |
| Escolta del FaroBeacon Escort | NivelLevel9–11 | RarezaRarityNormalNormal | DóndeWhereOdo (Ruinas) y Sabina (Hondonada), los buhonerosOdo (Ruins) and Sabina (Hollow), the peddlers | Para quéWhat forMoverse: velocidad, recarga, pocionesMoving: speed, cooldowns, potions |
| Legión HuecaHollow Legion | NivelLevel10–12 | RarezaRarityComúnCommon | DóndeWhereMonstruos de las Ruinas y la HondonadaMonsters of the Ruins and the Hollow | Para quéWhat forTanque: mucha defensa; más lentoTank: lots of defense; slower |
| Juramento de CenizaAshen Oath | NivelLevel10–12 | RarezaRarityRaroRare | DóndeWhereEl Comandante Varek (Ruinas), pieza por piezaCommander Varek (Ruins), piece by piece | Para quéWhat forCañón de cristal: crítico y robo de vidaGlass cannon: crits and lifesteal |
| Última VigiliaLast Vigil | NivelLevel13–14 | RarezaRarityRaroRare | DóndeWhereOssaria, jefa del mundo; a veces élites y monstruosOssaria, the world boss; sometimes elites and monsters | Para quéWhat forContra jefes: +20% de daño a jefes y élitesAgainst bosses: +20% damage to bosses and elites |
| Última LuzLast Light | NivelLevel15 | RarezaRarityLegendarioLegendary | DóndeWhereOssaria (seguro en su tercer despertar)Ossaria (certain on her third awakening) | Para quéWhat forTodo terreno: lo mejor en todoAll-rounder: the best at everything |
| Bastión EternoEternal Bastion | NivelLevel18 | RarezaRarityLegendarioLegendary | DóndeWhereLlega con los Campos de FerrumComes with the Fields of Ferrum | Para quéWhat forFortalezaFortress |
| FundadoresFounders' | NivelLevel15 | RarezaRarityÚnicoUnique | DóndeWhereSe reclama una vez al llegar a nivel 15 (alpha)Claimed once on reaching level 15 (alpha) | Para quéWhat forAgradecimiento a quien juega la alphaA thank-you to alpha players |
Sets del AurimanteAuromancer sets
| SetSet | NivelLevel | RarezaRarity | DóndeWhere | Para quéWhat for |
|---|
| Iniciado de CenizaAsh Initiate | NivelLevel1–3 | RarezaRarityNormalNormal | DóndeWhereVela e Iris (Torre del Alba)Vela and Iris (Dawn Tower) | Para quéWhat forPara arrancarTo start |
| Novicio del AlbaDawn Novice | NivelLevel4–6 | RarezaRarityNormalNormal | DóndeWhereVela e Iris (Torre del Alba)Vela and Iris (Dawn Tower) | Para quéWhat forRáfagas: crítico; menos vidaBursts: crits; less health |
| Peregrino de CenizaAsh Pilgrim | NivelLevel5–8 | RarezaRarityComúnCommon | DóndeWhereMonstruos del Bosque y las LomasMonsters of the Forest and the Hills | Para quéWhat forAguante: maná que dura; menos dañoStamina: mana that lasts; less damage |
| TejeluzLightweaver | NivelLevel9–11 | RarezaRarityNormalNormal | DóndeWhereOdo (Ruinas) y Sabina (Hondonada), los buhonerosOdo (Ruins) and Sabina (Hollow), the peddlers | Para quéWhat forMoverse: velocidad, recarga, pocionesMoving: speed, cooldowns, potions |
| El SoñadorThe Dreamer | NivelLevel10–12 | RarezaRarityComúnCommon | DóndeWhereMonstruos de las Ruinas y la HondonadaMonsters of the Ruins and the Hollow | Para quéWhat forControl: congelar y aturdir más tiempoControl: longer freezes and stuns |
| Vidente del ÁnimaAnima Seer | NivelLevel10–12 | RarezaRarityRaroRare | DóndeWhereEl Comandante Varek (Ruinas), pieza por piezaCommander Varek (Ruins), piece by piece | Para quéWhat forCañón de cristal: crítico y maná al golpearGlass cannon: crits and mana on hit |
| Magíster ImperialImperial Magister | NivelLevel13–14 | RarezaRarityRaroRare | DóndeWhereOssaria, jefa del mundo; a veces élites y monstruosOssaria, the world boss; sometimes elites and monsters | Para quéWhat forContra jefes: +20% de daño a jefes y élitesAgainst bosses: +20% damage to bosses and elites |
| Primer AmanecerFirst Dawn | NivelLevel15 | RarezaRarityLegendarioLegendary | DóndeWhereOssaria (seguro en su tercer despertar)Ossaria (certain on her third awakening) | Para quéWhat forTodo terreno: lo mejor en todoAll-rounder: the best at everything |
| Coro AstralAstral Choir | NivelLevel18 | RarezaRarityLegendarioLegendary | DóndeWhereLlega con los Campos de FerrumComes with the Fields of Ferrum | Para quéWhat forHechizos siempre listosSpells always ready |
| FundadoresFounders' | NivelLevel15 | RarezaRarityÚnicoUnique | DóndeWhereSe reclama una vez al llegar a nivel 15 (alpha)Claimed once on reaching level 15 (alpha) | Para quéWhat forAgradecimiento a quien juega la alphaA thank-you to alpha players |
Templar paso a pasoTempering step by step
- Andá a Bram (Herrería) o a Iris (Torre del Alba) y abrí la pestaña Forjar.Go to Bram (Smithy) or Iris (Dawn Tower) and open the Forge tab.
- Elegí la pieza (puesta o en la mochila): te muestra qué pide para el siguiente nivel y la probabilidad.Pick the piece (worn or in your bag): it shows what the next level asks for and the chance.
- Si te alcanza, Templar. Si falla, solo se pierden las gemas: la pieza nunca baja ni se rompe.If you have enough, Temper. If it fails you only lose the gems: the piece never goes down or breaks.
Lo que pide, para una pieza de nivel 10 (el oro crece con el nivel de la pieza):What it takes, for a level-10 piece (the gold grows with the piece's level):
| NivelLevel | OroGold | FragmentosShards | GemasGems | ÉxitoSuccess | Más fuerteStronger |
|---|
| +1 | OroGold160 | FragmentosShards2 | GemasGems—— | ÉxitoSuccess100% | TotalTotal+4% |
| +2 | OroGold240 | FragmentosShards4 | GemasGems—— | ÉxitoSuccess100% | TotalTotal+8% |
| +3 | OroGold320 | FragmentosShards6 | GemasGems—— | ÉxitoSuccess100% | TotalTotal+12% |
| +4 | OroGold480 | FragmentosShards8 | GemasGems1 pulida de su piedra1 polished of its stone | ÉxitoSuccess85% | TotalTotal+18% |
| +5 | OroGold640 | FragmentosShards10 | GemasGems1 pulida de su piedra1 polished of its stone | ÉxitoSuccess75% | TotalTotal+24% |
| +6 | OroGold800 | FragmentosShards12 | GemasGems1 pulida de su piedra1 polished of its stone | ÉxitoSuccess65% | TotalTotal+30% |
| +7 | OroGold1.120 | FragmentosShards15 | GemasGems1 perfecta de su piedra + 1 granate pulido1 flawless of its stone + 1 polished garnet | ÉxitoSuccess50% | TotalTotal+38% |
| +8 | OroGold1.440 | FragmentosShards20 | GemasGems1 perfecta de su piedra + 1 granate pulido1 flawless of its stone + 1 polished garnet | ÉxitoSuccess40% | TotalTotal+46% |
| +9 | OroGold1.920 | FragmentosShards30 | GemasGems2 perfectas de su piedra + 1 Ánima del Coro2 flawless of its stone + 1 Anima of the Choir | ÉxitoSuccess30% | TotalTotal+54% |
- Qué piedra pide cada pieza: ámbar las armas y los guantes; ónix los escudos, cascos, pechos y piernas; zafiro los focos, las botas y las capas; granate los anillos y collares.Which stone each piece asks for: amber for weapons and gloves; onyx for shields, helms, chests and legs; sapphire for focuses, boots and cloaks; garnet for rings and amulets.
- Desde +4, cada nivel suma además un poco de velocidad de ataque (ámbar) o de recarga (las demás).From +4, each level also adds a little attack speed (amber) or cooldown reduction (the rest).
- Las Legendarias piden el triple de oro, el doble de Fragmentos, gemas y Ánima del Coro, y tienen el 70% de esa probabilidad.Legendaries cost triple the gold, double the Shards, gems and Anima of the Choir, and have 70% of that chance.
- Fragmentos de Ánima: vendiéndole almas a Bram (1 cada 4) y de los monstruos. Ánima del Coro: solo de Ossaria.Anima Shards: by selling souls to Bram (1 per 4) and from monsters. Anima of the Choir: only from Ossaria.
Incrustar gemas paso a pasoSocketing gems step by step
- Juntá gemas: caen de los monstruos (astilladas desde el nivel 4, pulidas desde el 8) y de los jefes (perfectas, de Ossaria).Gather gems: monsters drop them (chipped from level 4, polished from 8) and bosses do too (flawless, from Ossaria).
- Con Ilario (mercado) tallás 3 iguales en 1 mejor: 3 astilladas → 1 pulida (50 de oro), 3 pulidas → 1 perfecta (250).With Ilario (market) you cut 3 identical ones into a better one: 3 chipped → 1 polished (50 gold), 3 polished → 1 flawless (250).
- Con Nerea (al lado) elegís la pieza y la gema, e Incrustar: 40 / 120 / 350 de oro y 1 / 2 / 4 Fragmentos según la calidad. Una gema por pieza; una nueva reemplaza a la anterior.With Nerea (next to him) you pick the piece and the gem, then Socket: 40 / 120 / 350 gold and 1 / 2 / 4 Shards by quality. One gem per piece; a new one replaces the old.
- ¿Te arrepentiste? En Desincrustar te la devuelve entera, pero cuesta: 400 / 900 / 2.000 de oro y 15 / 25 / 40 Fragmentos. Pensá bien cuál ponés.Changed your mind? Under Remove Gems she gives it back whole, but it costs: 400 / 900 / 2,000 gold and 15 / 25 / 40 Shards. Choose carefully.
| GemaGem | AstilladaChipped | PulidaPolished | PerfectaFlawless | Ideal paraBest for |
|---|
| GranateGarnet | AstilladaChipped+10 vida, −0,5% recarga+10 health, −0.5% cooldown | PulidaPolished+22 vida, −1% recarga+22 health, −1% cooldown | PerfectaFlawless+45 vida, −1,5% recarga+45 health, −1.5% cooldown | Ideal paraBest forAguantar másLasting longer |
| ZafiroSapphire | AstilladaChipped+5 maná, −1% recarga+5 mana, −1% cooldown | PulidaPolished+12 maná, −2% recarga+12 mana, −2% cooldown | PerfectaFlawless+25 maná, −3% recarga+25 mana, −3% cooldown | Ideal paraBest forMás poderes seguidosMore powers in a row |
| ÁmbarAmber | AstilladaChipped+1 daño, +1% vel. de ataque+1 damage, +1% attack speed | PulidaPolished+2–3 daño, +2% vel. de ataque+2–3 damage, +2% attack speed | PerfectaFlawless+4–6 daño, +3% vel. de ataque+4–6 damage, +3% attack speed | Ideal paraBest forPegar másHitting harder |
| ÓnixOnyx | AstilladaChipped+2 defensa, +5 vida+2 defense, +5 health | PulidaPolished+4 defensa, +12 vida+4 defense, +12 health | PerfectaFlawless+8 defensa, +25 vida+8 defense, +25 health | Ideal paraBest forRecibir menosTaking less |
Consejo: templá primero el arma (es lo que más se nota) y usá las gemas astilladas para incrustar mientras subís; guardá las pulidas y perfectas para templar desde +4.Tip: temper your weapon first (it's what shows most) and socket chipped gems while you level; keep the polished and flawless ones for tempering from +4.
VI
Almas y el farolSouls and the lantern
Cada monstruo te da un poco de experiencia al morir y suelta un orbe de alma. Pasá cerca y va a tu farol (el contador azul arriba de la barra). La mayor parte de la experiencia viaja en las almas: en la barra de XP, la parte rayada es lo que vas a cobrar al entregarlas.Every monster gives you a little experience when it dies and drops a soul orb. Walk past it and it goes into your lantern (the blue counter above the bar). Most of the experience travels in the souls: on the XP bar, the striped part is what you'll collect when you hand them in.
¿A quién se las das?Who do you give them to?
Guiar las almasGuide the souls
A un FaroleroTo a Lampwarden
Toda la experiencia guardada y un 25% extra, algo de oro y reputación con la Orden. Cada alma entregada además llena la barra de Ossaria.All the stored experience plus 25%, some gold and reputation with the Order. Every soul handed in also fills Ossaria's bar.
Vender las almasSell the souls
A Bram, el herreroTo Bram, the blacksmith
El doble de oro y Fragmentos de Ánima para la forja, pero casi nada de experiencia, y a la Orden no le va a gustar.Double the gold plus Anima Shards for the forge, but almost no experience, and the Order won't like it.
El farolThe lantern
- Tiene lugar limitado: si se llena, las almas nuevas se pierden. Volvé a entregar o mejoralo.It has limited room: once it's full, new souls are lost. Hand them in or upgrade it.
- Mejorarlo cuesta oro (1.500 el primero) y solo lo hace la Hermana Maren, en la Tienda del Faro.Upgrading it costs gold (1,500 for the first) and only Sister Maren does it, in the Beacon Shop.
- Si morís, perdés la mitad de las almas que llevabas.If you die, you lose half of the souls you were carrying.
Dónde están los FarolerosWhere the Lampwardens are
Hay en cada zona, así que no hace falta volver al pueblo. En el minimapa y en el mapa aparecen con un farol ámbar (Bram, con un yunque); si están lejos, el ícono queda en el borde del minimapa apuntando hacia ellos.There's one in every zone, so you don't need to go back to town. On the minimap and the map they show as an amber lantern (Bram as an anvil); if they're far, the icon sits on the minimap's edge pointing their way.
| FaroleroLampwarden | DóndeWhere |
|---|
| Hermana MarenSister Maren | Tienda del Faro, Lumbrera (la única que mejora el farol)Beacon Shop, Lumbrera (the only one who upgrades the lantern) |
| Hermano Abel, Hermana LucíaBrother Abel, Sister Lucía | Al pie del Faro Mayor, LumbreraAt the foot of the Great Beacon, Lumbrera |
| Hermano GaloBrother Galo | Faro de los Campos (Campos Grises)Fields Beacon (Gray Fields) |
| Hermano LudoBrother Ludo | Faro del VadoFord Beacon |
| Hermana InésSister Inés | Farolillo del Claro, en el Claro del Susurro (Bosque de las Voces)Glade Lantern Post, in the Whispering Glade (Forest of Voices) |
| Hermana ElenaSister Elena | Farolillo de la Cascada (Bosque de las Voces)Cascade Lantern Post (Forest of Voices) |
| Hermano DaríoBrother Darío | Faro de las Lomas (Lomas de Ceniza)Ashen Hills Beacon (Ashen Hills) |
| Hermano TobíasBrother Tobías | Farolillo de Vigilia, a la entrada de las RuinasVigil Lantern Post, at the entrance to the Ruins |
| Hermana DeliaSister Delia | Farolillo del Mirador, arriba en las Ruinas, cerca de la torre de VarekLookout Lantern Post, up in the Ruins, near Varek's Tower |
| Hermana ClaraSister Clara | Farolillo de la Hondonada, al borde de la HondonadaHollow Lantern Post, at the edge of the Hollow |
Santuarios: alrededor de cada Faro y farolillo de afuera, un halo de humo cálido marca su santuario. Adentro, los monstruos no te persiguen, y arriba a la izquierda dice zona segura.Sanctuaries: around every Beacon and lantern post out in the vale, a halo of warm smoke marks its sanctuary. Inside, monsters don't chase you, and the top left reads safe zone.
VII
ViajarTravel
Moverse más rápidoMoving faster
| BonoBonus | VelocidadSpeed | CómoHow |
|---|
| CaminosRoads | VelocidadSpeed+15% | Sobre caminos, puentes y calles del pueblo.On roads, bridges and town streets. |
| Paso de viajeroTraveler's stride | VelocidadSpeed+10% | Después de unos segundos sin pelear.After a few seconds out of combat. |
| BotasBoots | VelocidadSpeed+5% / +8% | Las de cuero y las sandalias de viajero.Leather boots and traveler's sandals. |
| Tónico del CaminanteWayfarer's Tonic | VelocidadSpeed+20% | 30 de oro (Botica, Ilse y las casas del valle). Dura 10 minutos; 3 minutos de recarga.30 gold (Apothecary, Ilse and the houses in the vale). Lasts 10 minutes; 3 minute cooldown. |
El máximo sin montura es +40%. Los bonos activos se ven arriba de la barra.The cap without a mount is +40%. Active bonuses show above the bar.
La Red de FarosThe Beacon Network
- Cada Faro o farolillo se enciende la primera vez que pasás cerca, y tiene su nombre en el poste para que sepas dónde estás.Every Beacon or lantern post lights up the first time you pass near it, and has its name on the post so you know where you are.
- Hablando con cualquier Farolero podés viajar a un Faro encendido pagando oro. En el mapa, los de Faros que todavía no encendiste se ven grises.Talk to any Lampwarden to travel to a lit Beacon for gold. On the map, the ones at Beacons you haven't lit yet show gray.
- Si morís, volvés al Faro encendido más cercano a donde caíste.If you die, you come back at the lit Beacon nearest to where you fell.
Pergamino de Retorno: LumbreraReturn Scroll: Lumbrera
Desde el nivel 10; 40 de oro con la Hermana Maren, Ilse y las casas del valle. Tecla 0: 5 segundos leyendo (se enciende una runa bajo tus pies) y se abre un portal a Lumbrera a un par de pasos. Tocá Ir a Lumbrera o el portal y aparecés en las calles del pueblo. El portal dura 1 minuto y solo lo cruzás vos. Si te movés o te pegan mientras leés, se corta y el pergamino no se gasta.From level 10; 40 gold from Sister Maren, Ilse and the houses in the vale. Key 0: 5 seconds of reading (a rune lights up under your feet) and a portal to Lumbrera opens a couple of steps away. Tap Go to Lumbrera or the portal and you appear in the town's streets. The portal lasts 1 minute and only you can use it. If you move or get hit while reading, it breaks and the scroll isn't used up.
El mapaThe map
M abre el mapa grande. Con Valle y Mundo ves el continente entero, con las otras 5 zonas en desarrollo. A la derecha, el evento del mundo y los filtros (Misiones, Faroleros, Equipo, Pociones, Almacén, Faros). Click derecho en el mapa o en el minimapa y tu personaje camina solo hasta ahí.M opens the big map. With Vale and World you see the whole continent, with the other 5 zones under development. On the right, the world event and the filters (Quests, Lampwardens, Gear, Potions, Vault, Beacons). Right-click the map or the minimap and your character walks there on its own.
VIII
Grupo y comercioParty and trade
Armar un grupoForming a party
- D → Invitar al grupo → click en el jugador, o
/grupo nombre. Hasta 4.D → Invite to party → click the player, or /party name. Up to 4.
- Debajo de las misiones ves a los demás con su vida (♛ el líder; apagado si está a más de 50 m). En los mapas son puntos verdes, y en el mapa grande podés marcar un punto para el grupo (Shift+click).Below the quests you see the others with their health (♛ is the leader; dimmed if over 50 m away). On the maps they're green dots, and on the big map you can mark a spot for the party (Shift+click).
/p mensaje habla solo con el grupo. Salir en el panel o /salir; el líder saca a alguien con la × de su fila. Si te desconectás salís del grupo./p message talks only to the party. Leave in the panel; the leader kicks someone with the × on their row. Disconnecting takes you out of the party.
NuevoNew
El botín del grupo se comparte: lo que tira un monstruo que mató alguien de tu grupo lo podés agarrar vos también, enseguida, sin esperar (no lo ves en gris).Party loot is shared: what a monster drops when someone in your party killed it, you can pick up too, right away, no waiting (it doesn't show gray).
Subir de nivel en grupoLeveling as a party
- Lo que mata cualquiera del grupo se reparte entre los que están a menos de 50 m y vivos, aunque no hayan pegado, y todos lo cuentan para sus misiones.Whatever anyone in the party kills is shared among those within 50 m and alive, even if they didn't hit it, and it counts for everyone's quests.
- El de más nivel reparte: la XP se calcula para él (si el monstruo es débil para él, todos ganan poco) y cada uno se lleva una parte según su nivel.The highest level sets the pace: XP is worked out for them (if the monster is weak for them, everyone gets little) and each one takes a share by level.
- Con hasta 5 niveles de diferencia conviene: +10% de XP por cada compañero (+30% con cuatro) y cada uno su orbe de alma.Within 5 levels of each other it pays: +10% XP per partner (+30% with four) and each gets their own soul orb.
- Con más diferencia sube más lento que solo: el más bajo se lleva casi nada (no se sube por arrastre).With a bigger gap it's slower than solo: the lowest gets almost nothing (no power-leveling).
IntercambiarTrading
D → Comerciar → click en el jugador (a menos de 8 m; si está más lejos, vas caminando). Tu personaje se lo pide en voz alta. Ofrecé cosas desde la mochila, lo que tenés puesto o un guardarropa: hasta 12 cosas por lado (un set entero) y oro. Lo que pasa con tu intercambio sale en amarillo en el chat.D → Trade → click the player (within 8 m; if farther, you walk over). Your character asks out loud. Offer things from your bag, what you're wearing or a wardrobe: up to 12 things per side (a whole set) and gold. What happens with your trade shows in yellow in the chat.
Ver equipoSee equipment
D → Ver equipo → click en un jugador cerca: su nivel, sus estadísticas, lo que tiene puesto (comparado con lo tuyo) y su modelo en 3D.D → See equipment → click a nearby player: their level, stats, what they're wearing (compared with yours) and their 3D model.
IX
Misiones y encargos diariosQuests and daily errands
Cómo se siguenHow to follow them
- Un «!» sobre la cabeza de un personaje es una misión para vos: click, leé y tocá Aceptar. Un «?» marca adónde va tu paso: a quién hablarle, quién vende lo que tenés que comprar, a quién entregarle.A "!" over someone's head is a quest for you: click, read and press Accept. A "?" marks where your step goes: who to talk to, who sells what you must buy, who to hand in to.
- Tres colores: primarias en amarillo (la historia del Valle y la de tu clase), secundarias en azul y encargos diarios en verde.Three colors: main quests in yellow (the Vale's story and your class's), side quests in blue and daily errands in green.
- Lo que tenés que hacer está a la izquierda, en grupos plegables; la flechita ➤ te lleva al objetivo. El «–» achica la lista a una barrita.What you need to do is on the left, in foldable groups; the little ➤ arrow takes you to the objective. The "–" shrinks the list to a single bar.
- Todo lo que pide el paso se marca en el minimapa y el mapa: un círculo dorado donde viven los monstruos que buscás, un rombo dorado sobre el lugar adonde ir (y sobre el nombre de los monstruos que cuentan).Everything a step asks for is marked on the minimap and map: a golden circle where the monsters you need live, a golden diamond over the place to reach (and over the names of the monsters that count).
- El registro de misiones (el «!» en el borde del minimapa) tiene los encargos de hoy, las primarias y las secundarias, con qué falta y a quién pedírsela.The quest log (the "!" on the minimap's edge) holds today's errands, the main and the side quests, with what's left and who gives each one.
- Tocar cosas: algunas misiones piden leer un diario, juntar páginas o romper faroles negros del Culto. Lo que hay que tocar brilla con un aro dorado. Romper un farol lleva unos segundos: si te movés o te pegan, se corta.Touching things: some quests ask you to read a journal, gather pages or smash the Cult's black lanterns. What you need to touch glows with a golden ring. Smashing a lantern takes a few seconds: moving or getting hit stops it.
- Escoltar la carreta (Relevo en el Puesto): sale cuando llegás a la puerta este y va a paso de caminata. Si la emboscan se para; pegales a los que la atacan para que vengan por vos. Si la rompen, volvé a la puerta y sale otra.Escorting the cart (Relief for the Post): it leaves when you reach the east gate and moves at a walk. When ambushed it stops; hit its attackers so they come for you. If it breaks, go back to the gate and another one sets off.
Las que enseñanThe ones that teach
Los primeros niveles te enseñan el juego: la Hermana Maren con La primera alma (comprar un arma y una poción, cazar Lodos, entregar sus almas); la Sargento Brisa, una pieza de armadura; Ilse, el guardarropa; tu entrenador, tu primer poder y tu primera estrella; Bram, templar tu arma a +1; Nerea, tu primera gema; y en el nivel 9 el Hermano Tobías te manda con Odo, el buhonero de las Ruinas, que vende equipo que en el pueblo no hay.The first levels teach you the game: Sister Maren with The First Soul (buy a weapon and a potion, hunt Oozes, hand in their souls); Sergeant Brisa, a piece of armor; Ilse, the wardrobe; your trainer, your first power and first star; Bram, tempering your weapon to +1; Nerea, your first gem; and at level 9 Brother Tobías sends you to Odo, the peddler of the Ruins, who sells gear the town doesn't have.
La historia del ValleThe Vale's story
| MisiónQuest | QuiénGiver | NivelLevel |
|---|
| Todavía noNot Yet | Hermana MarenSister Maren | NivelLevel1 |
| La primera almaThe First Soul | Hermana MarenSister Maren | NivelLevel1 |
| El barro que lloraThe Weeping Mud | Hermano GaloBrother Galo | NivelLevel2 |
| El surco que no terminaThe Endless Furrow | Rosa | NivelLevel3 |
| Lo que dicen los lobosWhat the Wolves Say | Bram | NivelLevel4 |
| El pozo de OdileOdile's Well | Odile | NivelLevel5 |
| El juramentoThe Oath JuramentadosOathsworn | Sargento BrisaSergeant Brisa | NivelLevel6 |
| El cazador que no volvióThe Hunter Who Didn't Come Back | Hermana InésSister Inés | NivelLevel6 |
| Relevo en el PuestoRelief for the Post | Capitán SorelCaptain Sorel | NivelLevel7 |
| Las mil cúpulasThe Thousand Domes AurimantesAuromancers | Vela | NivelLevel8 |
| La campana del FaroThe Beacon's Bell | Capitán SorelCaptain Sorel | NivelLevel8 |
| La guardia que no terminóThe Watch That Never Ended | Viejo TeoOld Teo | NivelLevel9 |
| Faroles negrosBlack Lanterns | Hermana MarenSister Maren | NivelLevel11 |
| Comandante VarekCommander Varek | Sargento BrisaSergeant Brisa | NivelLevel12 |
| Los MilThe Thousand | Hermana MarenSister Maren | NivelLevel13 |
| El Pastor de Faroles NegrosThe Shepherd of Black Lanterns | Hermana MarenSister Maren | NivelLevel14 |
Desde el nivel 6 cuentan la historia del Valle. La última te lleva contra Lisandro (ver Jefes).From level 6 on they tell the Vale's story. The last one takes you to Lisandro (see Bosses).
Encargos diariosDaily errands
Después de La primera alma, Anselmo, el Pregonero (en la plaza del Faro Mayor, con un «!» verde) tiene 3 encargos por día según tu nivel: llevar una carta a un Farolero, cazar algo, entregar almas, hacer un mandado a un comerciante de afuera o escoltar la carreta del Puesto. Siempre se termina volviendo con él.After The First Soul, Anselmo, the Town Crier (in the Great Beacon's square, with a green "!") has 3 errands a day for your level: carry a letter to a Lampwarden, hunt something, hand in souls, run an errand for a merchant out in the vale, or escort the Post's cart. You always finish back with him.
- Cada uno da XP, oro y una gema al azar (desde el nivel 10, a veces pulida), según su dificultad: Fácil (una carta), Normal (cazar, almas, un mandado) o Difícil (la carreta, la Hondonada, muchas almas: el que más da).Each gives XP, gold and a random gem (from level 10, sometimes polished), by difficulty: Easy (a letter), Normal (hunting, souls, an errand) or Hard (the cart, the Hollow, lots of souls: the best paying).
- Se renuevan todos los días a las 6 de la mañana (hora de Argentina, UTC−3): lo que quedó a medias se pierde.They refresh every day at 6 a.m. (Argentina time, UTC−3): anything left half-done is lost.
X
Tiendas y NPCsShops and NPCs
Comprar y venderBuying and selling
- Comprar: cada set es una fila con su precio; una ▲ verde marca lo que es mejor que lo tuyo. Click para comprar; Shift+click compra 5 pociones. La (i) en cada ítem dice para qué sirve.Buying: each set is a row with its price; a green ▲ marks what beats your current piece. Click to buy; Shift+click buys 5 potions. The (i) on each item says what it's for.
- Vender: click derecho en un ítem de la mochila, o arrastralo a la tienda (también desde lo que tenés puesto). Varios juntos: marcalos con Ctrl+click y click derecho en uno. Te pagan un cuarto de lo que vale, y cualquier comerciante compra cualquier cosa.Selling: right-click an item in your bag, or drag it to the shop (also from what you're wearing). Several at once: mark them with Ctrl+click and right-click one. You get a quarter of its value, and any merchant buys anything.
- ¿Vendiste algo por error? En la pestaña Vendidos lo recuperás por lo mismo que te pagaron.Sold something by mistake? The Sold tab gets it back for what you were paid.
LumbreraLumbrera
El pueblo está en una colina y la calle en espiral sube hasta el Faro Mayor. Al oeste (la puerta a los Campos), el barrio de los guerreros; al noreste, la Torre del Alba; al sur, la taberna, el mercado y la Botica. Hay callejones que cortan camino.The town sits on a hill and a spiral street climbs to the Great Beacon. To the west (the gate to the Fields), the warriors' quarter; to the northeast, the Dawn Tower; to the south, the tavern, the market and the Apothecary. Alleys cut between the streets.
Tienda del FaroBeacon Shop
Hermana MarenSister Maren
Guiar almas, viajar, mejorar el farol. Amuletos, anillos, pociones de vida y el Pergamino de Retorno.Guide souls, travel, upgrade your lantern. Amulets, rings, health potions and the Return Scroll.
Herrería de BramBram's Smithy
Bram y sus aprendices Tilo y BrendaBram and his apprentices Tilo and Brenda
Equipo y auras para Juramentados; te compran almas. Bram, además, templa.Gear and auras for the Oathsworn; they buy souls. Bram also tempers.
Torre del AlbaDawn Tower
Vela, la tejedora de luz, e IrisVela, the Light Weaver, and Iris
Equipo y auras para Aurimantes. Vela entrena; Iris templa.Gear and auras for Auromancers. Vela trains; Iris tempers.
Botica de OdileOdile's Apothecary
Odile y su aprendiz NiloOdile and her apprentice Nilo
Pociones, Tónico del Caminante, la Pócima de Liberación y la pestaña Destilar.Potions, Wayfarer's Tonic, the Draught of Unbinding and the Distill tab.
MercadoMarket
Ilario y NereaIlario and Nerea
Ilario talla gemas; Nerea las incrusta y las saca.Ilario cuts gems; Nerea sockets and removes them.
Taberna El PabiloThe Wick Tavern
Ilse y LiraIlse and Lira
Ilse vende pociones, el Tónico y el Pergamino de Retorno; Lira, la juglar, sus canciones: las auras.Ilse sells potions, the Tonic and the Return Scroll; Lira, the bard, her songs: the auras.
Almacén del GremioGuild Vault
Ferro, Quila
Guardar y retirar oro. La bóveda es de la cuenta y es la misma en todas las ventanillas.Deposit and withdraw gold. The vault belongs to your account and is the same at every counter.
Plaza del Faro MayorGreat Beacon square
Hermano Abel, Hermana Lucía, AnselmoBrother Abel, Sister Lucía, Anselmo
Guiar almas y viajar sin entrar a la tienda; los encargos diarios.Guide souls and travel without going into the shop; the daily errands.
Ocho vecinos recorren las calles (con su nombre en gris): revuelven cajones, miran el pozo, charlan con los comerciantes. Con ellos no se habla. Afuera, en las Ruinas, los buhoneros Odo y Sabina venden equipo que en el pueblo no hay.Eight villagers walk the streets (their names in gray): they rummage through crates, look into the well, chat with the merchants. You can't talk to them. Out in the Ruins, the peddlers Odo and Sabina sell gear the town doesn't have.
Las casas del valleThe houses out in the vale NuevoNew
En cada casa de afuera vive alguien que vende pociones de vida y maná, el Tónico del Caminante y el Pergamino de Retorno. Y adentro es zona segura, como el pueblo: los monstruos no entran ni te siguen, se camina y no se pelea. Un buen lugar para respirar entre peleas.In every house out in the vale lives someone who sells health and mana potions, the Wayfarer's Tonic and the Return Scroll. And inside it's a safe zone, like town: monsters don't come in or follow you, you walk and nobody fights. A good place to catch your breath between fights.
| CasaHouse | ZonaZone | Quién vendeWho sells |
|---|
| Granja OrthOrth Farm | Campos GrisesGray Fields | Tomasa |
| Casa del molineroMiller's Cottage | Campos GrisesGray Fields | Greta |
| Puesto del Puente ViejoBridge Watchhouse | Campos GrisesGray Fields | Benita |
| Cabaña del cazadorHunter's Cabin | Bosque de las VocesForest of Voices | Fausto |
| Refugio del leñadorWoodsman's Lodge | Bosque de las VocesForest of Voices | Alda |
| Ermita de la CascadaCascade Hermitage | Bosque de las VocesForest of Voices | Ermitaño OrloHermit Orlo |
| Barracón de las LomasAshen Hills Barracks | Lomas de CenizaAshen Hills | Cabo BastoCorporal Basto |
| Posta del CaminoWayfarer's Rest | Lomas de CenizaAshen Hills | Maura |
| Cuartel imperialImperial Barracks | Ruinas de VigiliaVigil Ruins | Ciro (y un guardarropa con tus cosas)Ciro (and a wardrobe with your stored items) |
XI
EventosEvents
Qué está pasando ahora en el juego y cuándo es la próxima invasión: Eventos en vivo.What's going on in the game right now and when the next invasion is: Live events.
InvasionesInvasions
Cada hora en punto los monstruos de una zona marchan sobre un lugar. Se avisa con un cartel grande 10, 5 y 1 minutos antes y al empezar (suena la campana de Lumbrera en todo el valle); el minimapa titila en rojo y en los mapas un círculo naranja marca la batalla.Every hour on the hour the monsters of one zone march on a place. A big banner warns you 10, 5 and 1 minutes before and when it starts (Lumbrera's bell rings across the vale); the minimap flashes red and an orange circle marks the battle on the maps.
| InvasiónInvasion | NivelesLevels | Marchan sobreMarching on | JefeLeader |
|---|
| La Charca se desbordaThe Pond Overflows | NivelesLevels2–5 | DóndeWherela Granja OrthOrth Farm | JefeLeaderMadre LodoMother Ooze |
| La manada de Colmillo ViejoOld Fang's Pack | NivelesLevels5–9 | DóndeWherela Cabaña del cazadorthe Hunter's Cabin | JefeLeaderColmillo ViejoOld Fang |
| La Legión marchaThe Legion Marches | NivelesLevels9–13 | DóndeWhereel Faro del Vadothe Ford Beacon | JefeLeaderEl Centurión HuecoThe Hollow Centurion |
| La Noche de los EcosThe Night of Echoes | NivelesLevels12–15 | DóndeWherela puerta este de Lumbrerathe east gate of Lumbrera | JefeLeaderLa Que AbrazaShe Who Embraces |
- Tres oleadas: la primera entra por un lado, la segunda por dos y la tercera por todos (en los mapas, unos puntos marcan por dónde llega la próxima). Los invasores tienen un contorno amarillo.Three waves: the first comes from one side, the second from two and the third from all of them (dots on the maps show where the next one enters). Invaders have a yellow outline.
- Después, una columna de luz dorada marca por dónde llega su jefe (una calavera roja lo sigue en los mapas). Sale con escolta y al 30% de vida se enfurece.Then a column of golden light marks where their leader arrives (a red skull follows it on the maps). It comes with an escort and at 30% health it goes wild.
- Hay 9 minutos para vencerlos. Si pierden, los invasores toman el lugar 20 minutos (un círculo rojo rayado en los mapas).You have 9 minutes to beat them. If you fail, the invaders hold the place for 20 minutes (a striped red circle on the maps).
- En el mapa grande, Próximos eventos dice cuál viene y en cuánto.On the big map, Next events tells you which one is next and when.
El cofre de la invasión. Los invasores no tiran nada al piso: si ganan, aparece un cofre dorado en el medio de la batalla con la recompensa de cada uno que peleó: XP, oro, Fragmentos de Ánima, al menos 3 gemas (una cuarta la mitad de las veces), a veces una gema perfecta (para templar a +7 y +9) y a veces una pieza de equipo; más cuanto más ayudaste. Hacé click en el cofre y las cosas saltan a tu alrededor, solo para vos. Te espera mientras sigas conectado, pero si te desconectás o ya se avisa la próxima invasión sin haberlo abierto, se pierde.The invasion chest. Invaders drop nothing on the ground: if you win, a golden chest appears in the middle of the battle with a reward for everyone who fought: XP, gold, Anima Shards, at least 3 gems (a 4th half the time), sometimes a flawless gem (for tempering to +7 and +9) and sometimes a piece of gear; more the more you helped. Click the chest and the loot spills out around you, for you alone. It waits as long as you stay online, but if you disconnect or the next invasion is announced before you open it, it's lost.
La Noche del PastorThe Night of the Shepherd
Los sábados de 21 a 22 (hora de Argentina, UTC−3), Lisandro vuelve a salir en el medio de la Hondonada, más fuerte, para todos los que ya terminaron la historia del Valle. Se avisa en el chat 10 minutos antes. Una vez por semana deja un Raro, piezas Normales y Comunes, y a veces un Legendario.Saturdays from 9 to 10 p.m. (Argentina time, UTC−3), Lisandro rises again in the middle of the Hollow, stronger, for everyone who has finished the Vale's story. The chat warns you 10 minutes before. Once a week he drops a Rare, Normal and Common pieces, and sometimes a Legendary.
XII
JefesBosses
Los jefes avisan con un sonido antes de cada golpe fuerte y marcan el piso: cuando lo oigas, mirá el piso y salí de la forma. Cada uno deja a los que lo pelearon su propio botín, que solo ve cada uno.Bosses warn with a sound before every heavy blow and mark the ground: when you hear it, look down and get out of the shape. Each leaves everyone who fought it their own loot, visible only to them.
ÉlitesElites
En cada parte del Valle hay un monstruo con nombre, más grande y de otro color, con el nombre en cobre. Sale en uno de 3 lugares de su zona y vuelve 25–45 minutos después de caer. Es mucho más duro que los de su especie: andá con grupo.Every part of the Vale has a named monster, bigger and differently colored, with its name in copper. It appears in one of 3 spots in its zone and returns 25–45 minutes after it falls. It's much tougher than its kind: bring a party.
| ÉliteElite | NivelLevel | DóndeWhere |
|---|
| RastrojoStubble LabriegoFarmhand | NivelLevel5 | Junto al Molino de OrthBy Orth's Mill |
| Garra PálidaPale Claw Lobo blancoWhite wolf | NivelLevel8 | Bosque de las VocesForest of Voices |
| CenizaAsh Loba grisGray she-wolf | NivelLevel9 | Lomas de CenizaAshen Hills |
| El SepultureroThe Gravedigger SoñadorDreamer | NivelLevel10 | Cementerio de los Sin NombreCemetery of the Nameless |
| El Sargento DolanSergeant Dolan LegionarioLegionary | NivelLevel12 | Patio de armas (Ruinas)Training Yard (Ruins) |
| La Que Canta SolaShe Who Sings Alone EcoEcho | NivelLevel15 | Hondonada de los MilHollow of the Thousand |
A cada uno que peleó le deja su propia pieza que no vende nadie y, desde el nivel 8, a veces un Raro. De vez en cuando (1 de cada 10), su anillo, que no deja nadie más. Y más raro todavía (1 de cada 25), su trofeo: su cabeza colgando de una cadena, con la llama de tu farol adentro. Va en el casillero Trofeo, no da atributos y todos lo ven.Everyone who fought it gets their own piece no shop sells and, from level 8, sometimes a Rare. Now and then (1 in 10), its ring, which nobody else drops. Rarer still (1 in 25), its trophy: its head hanging from a chain, with your lantern's flame burning inside. It goes in the Trophy slot, gives no stats and everyone sees it.
Comandante VarekCommander Varek 12
Aparece en un lugar distinto de las Ruinas de Vigilia cada vez (al pie de su torre, en el patio norte, detrás del Cuartel o en el borde sureste) y vuelve 2 horas después de caer. A un nivel 10–12 solo le cuesta: llevá pociones y mirá el piso.He appears in a different spot in the Vigil Ruins every time (at the foot of his tower, in the north yard, behind the Barracks or on the southeast edge) and returns 2 hours after he falls. Alone at level 10–12 it's hard: bring potions and watch the ground.
- Golpe de escudo al piso bajo tu personaje: salí del círculo o te frena.Shield slam on the ground under you: get out of the circle or it slows you.
- Barrido en anillo alrededor suyo: pegate a él o alejate.Sweep in a ring around him: hug him or get away.
- Lluvia de ballestas bajo tus pies si lo peleás de lejos.Crossbow volley under your feet if you fight him from afar.
- Al 50% llama a 2 Legionarios y sale a perseguirte mucho más rápido, casi como corrés vos.At 50% he calls 2 Legionaries and gives chase much faster, almost as fast as you run.
- Al 30%, su última resistencia: pega más, más seguido, y corre todavía más.At 30%, his last stand: he hits harder, more often, and runs faster still.
Botín: a cada uno que le hizo una buena parte del daño, la mitad de las veces una pieza de su set (Juramento de Ceniza o Vidente del Ánima, según tu clase), a veces una del set de la otra clase y si no una pieza Normal, más una gema.Loot: everyone who did a good share of the damage gets, half the time, a piece of his set (Ashen Oath or Anima Seer, by class), sometimes one from the other class's set and otherwise a Normal piece, plus a gem.
Ossaria, el Coro de los MilOssaria, Choir of the Thousand 15
El jefe del mundo: un gigante de fantasmas de 10 m. Debajo del minimapa está la barra de Almas de la ciudad: cada alma que alguien entrega en un Faro la llena. Cuando se llena (y pasó al menos una hora desde que cayó el anterior), Ossaria se alza en algún lugar del Valle lejos del pueblo. A todos les llega un aviso, queda marcada en rojo en los mapas, y cualquiera puede sumarse. Click en la barra abre su ventana, con sus etapas y Ver ubicación en el mapa.The world boss: a 10 m giant made of ghosts. Below the minimap is the Souls of the town bar: every soul anyone hands in at a Beacon fills it. When it's full (and at least an hour has passed since the last one fell), Ossaria rises somewhere in the Vale far from town. Everyone is warned, she's marked in red on the maps, and anyone can join. Click the bar to open her window, with her stages and Locate on map.
Etapas del despertarAwakening stages
Cada despertar sube una etapa: más vida y mejor botín. Después de la III vuelve a la I.Each awakening climbs one stage: more health and better loot. After Stage III it starts over at I.
Etapa IStage I
1.500 almas · 15.000 de vida1,500 souls · 15,000 HP
- ~350+ de oro en 7 grandes montones~350+ gold in 7 big piles
- Equipo Normal exclusivo; 45% de un RaroExclusive Normal gear; 45% chance of a Rare
- Al menos 2 gemas (la segunda pulida o perfecta), a veces 3At least 2 gems (the second polished or flawless), sometimes 3
Etapa IIStage II
3.000 almas · 30.000 de vida3,000 souls · 30,000 HP
- ~700+ de oro en 8 montones~700+ gold in 8 piles
- Un Raro seguro; 35% de un LegendarioA guaranteed Rare; 35% chance of a Legendary
- Gemas pulidas o perfectas; 20% de Ánima del CoroPolished or flawless gems; 20% chance of Anima of the Choir
Etapa IIIStage III
4.500 almas · 45.000 de vida4,500 souls · 45,000 HP
- ~1.200+ de oro en 9 montones~1,200+ gold in 9 piles
- Un Legendario y un Raro segurosA guaranteed Legendary and Rare
- 2 gemas de alta pureza; 45% de Ánima del Coro2 high-purity gems; 45% chance of Anima of the Choir
En todas, además: 30 orbes de alma (10 de ellos Súper-Almas que valen 3), experiencia según tu nivel y, a veces, el Anillo del ojo de lobo.In every stage, also: 30 soul orbs (10 of them Super-Souls worth 3), XP scaled to your level and, sometimes, the Wolfeye Ring.
Cómo peleaHow she fights
Tiene muchísima vida: hay que ir entre varios. Antes de cada ataque fuerte se marca una forma naranja en el piso que se va llenando: cuando se llena, pega a todo el que esté adentro. Su golpe normal salpica a los que están pegados al que ataca, y cada tanto se desliza de costado. La pelea tiene tres partes:She has a huge amount of health: go with others. Before every heavy attack an orange shape is marked on the ground and fills up: when it's full, it hits everyone inside. Her normal blow splashes onto those standing next to her target, and now and then she slides sideways. The fight has three parts:
-
El CoroThe Choir desde el iniciofrom the start
- Pisotón: un círculo bajo tus pies. Salí.Stomp: a circle under your feet. Step out.
- La ola: un anillo grande alrededor suyo. Si el anillo está lejos de ella, acercate; si es un círculo pegado a ella, alejate.The wave: a big ring around her. If the ring is far from her, move in; if it's a circle right around her, move away.
- Lluvia de faroles: muchos círculos chicos.Lantern rain: many small circles.
-
El LamentoThe Lament al 70% de vidaat 70% health
- Se hunde en la tierra: desaparece 2 segundos, después un círculo marca por dónde va a salir, y 2 segundos más tarde sale de golpe al lado de alguno de los que pelean. Salí del círculo.She burrows: she vanishes for 2 seconds, then a circle marks where she'll come up, and 2 seconds later she erupts next to one of the fighters. Get out of the circle.
- El Frío del Coro: cuando lo avisa, metete en uno de los círculos de luz cálida.The Chill of the Choir: when it's announced, get into one of the circles of warm light.
- Círculos azules: cuando le baja la vida, de ahí salen fantasmas que la ayudan.Blue circles: as her health drops, ghosts come out of them to help her.
-
El GritoThe Scream al 40% de vidaat 40% health
- Las Manos de los Mil salen debajo de cada uno, tres veces seguidas, y te dejan quieto: no te quedes parado.The Hands of the Thousand rise under each of you, three times in a row, and hold you in place: don't stand still.
- Las olas vienen más seguido y se hunde a menudo para salir al lado de otro jugador: ese pasa a ser su blanco.Waves come more often and she burrows often to come up next to another player: that one becomes her target.
- Pega más fuerte y más rápido en cada parte.She hits harder and faster in each part.
NuevoNew
Pócima de Liberación. La venden Odile y Nilo en la Botica, por 45 de oro. Rompe al instante lo que te tiene quieto (las Manos de los Mil) y te deja libre de eso durante 6 segundos. Recarga de 45 s. Llevá un par a El Grito y ponela en una casilla de la barra.Draught of Unbinding. Sold by Odile and Nilo at the Apothecary for 45 gold. It instantly breaks whatever holds you still (the Hands of the Thousand) and keeps you free of it for 6 seconds. 45 s cooldown. Bring a couple to The Scream and put one on a bar slot.
Lisandro, el Viajero de GrisLisandro, the Traveler in Gray 15
El jefe final del Valle, en la misión El Pastor de Faroles Negros (Hermana Maren, nivel 14, después de toda la historia y de la misión de tu clase). Duerme bajo tierra en el medio de la Hondonada y, cuando llegás cerca, sale del suelo y va por vos. En tu misión es tuyo: solo lo ven y lo pelean vos y tu grupo. Al vencerlo te deja un Legendario de tu clase que no tengas, un Raro, dos Normales y dos Comunes.The Vale's final boss, in the quest The Shepherd of Black Lanterns (Sister Maren, level 14, after the whole story and your class quest). He sleeps underground in the middle of the Hollow and, when you get close, he rises and comes for you. In your quest he's yours: only you and your party see and fight him. Beating him leaves you a Legendary of your class you don't own yet, a Rare, two Normal and two Common pieces.
- Te tira su sombra de lejos y cada tanto se cura (a él y a sus Ecos).He throws his shadow from afar and now and then heals (himself and his Echoes).
- Cada 15 segundos un círculo amarillo marca su ola de sombra: salí antes de que caiga. Después desaparece y sale al lado de alguno de ustedes, donde un círculo rojo avisa.Every 15 seconds a yellow circle marks his shadow wave: get out before it lands. Then he vanishes and comes up next to one of you, where a red circle warns.
- Al bajarle la vida llama a los Ecos de los Mil, que te rodean y disparan por turnos; cada Eco que matás deja una poción de vida y una de maná (se ponen solas en la barra).As his health drops he calls the Echoes of the Thousand, who surround you and shoot in turns; every Echo you kill leaves a health and a mana potion (they go straight onto your bar).
- El Rebaño (dos tercios de vida): la ola a veces llega como anillo (ahí hay que acercarse) y caen faroles negros donde estás parado. El Velo Roto (un tercio): salen almas debajo de cada uno, tres veces seguidas: no te quedes quieto.The Flock (two thirds of his health): the wave sometimes comes as a ring (move in then) and black lanterns fall where you stand. The Torn Veil (one third): souls reach up under each of you, three times in a row: keep moving.
Al volver con Maren se termina la historia del Valle. Y los sábados vuelve para todos: la Noche del Pastor.Going back to Maren ends the Vale's story. And on Saturdays he returns for everyone: the Night of the Shepherd.
XIII
MorirDying
Sos un Sin Ocaso: no morís del todo. Volvés al Faro encendido más cercano a donde caíste, con la vida llena. Lo que perdés es la mitad de las almas que llevabas en el farol: entregalas seguido si vas a meterte en algo peligroso.You're one of the Duskless: you never fully die. You come back at the lit Beacon nearest to where you fell, at full health. What you lose is half the souls in your lantern: hand them in often before you take on something dangerous.
XIV
ConsejosTips
- Encendé cada Faro que veas. Es tu red de viaje y tu punto de vuelta si caés.Light every Beacon you see. It's your travel network and where you come back if you fall.
- No llenes el farol de más. Si se llena, las almas nuevas se pierden; si morís, perdés la mitad.Don't overfill your lantern. Once full, new souls are lost; if you die, you lose half.
- Usá las casas del valle para recargar pociones y respirar sin volver al pueblo.Use the houses in the vale to restock potions and catch your breath without going back to town.
- Guardá las gemas. Desde +4 la forja las pide, y las perfectas valen oro para +7 y +9. Tres iguales, con Ilario, se vuelven una mejor.Keep your gems. From +4 the forge needs them, and flawless ones are gold for +7 and +9. Three identical ones become a better one with Ilario.
- Andá a las invasiones de tu nivel: el cofre da al menos 3 gemas por persona.Join the invasions for your level: the chest gives at least 3 gems per person.
- Si el juego anda lento: Esc → Opciones → Gráficos → Baja, y podés limitar los cuadros a 30 para que la notebook no se caliente. En Experimental hay gráficos de más para probar.If the game runs slow: Esc → Options → Graphics → Low, and you can cap the frames at 30 so your laptop stays cool. Experimental has extra graphics to try.
- Para leer mejor: en Interfaz, el tamaño de la interfaz y del minimapa; en Accesibilidad, nombres más grandes, colores para daltonismo, menos movimiento y alto contraste.To read better: in Interface, the size of the interface and minimap; in Accessibility, bigger names, color-blind colors, reduced motion and high contrast.
- Sonido: cada lugar tiene su música y su sonido de fondo; al pelear entra la música de pelea de la zona. Los volúmenes (general, música, ambiente y efectos) están en Opciones → Sonido.Sound: every place has its own music and background sounds; fights bring in the zone's battle music. The volumes (master, music, ambience and effects) are in Options → Sound.
- Ranking mundial: el globo en el borde del minimapa muestra a los mejores por nivel y los primeros del reino. Elegí tu bandera en Opciones → Juego.World ranking: the globe on the minimap's edge shows the top players by level and the realm firsts. Pick your flag in Options → Game.
- Comunidad: en la ventana de amigos (el ícono de la persona junto al minimapa) están Entrá a nuestro Discord y Compartir por WhatsApp: cada uno te da 150 de oro y experiencia, una vez por cuenta.Community: the friends window (the person icon by the minimap) has Join our Discord and Share on WhatsApp: each gives you 150 gold and experience, once per account.
- Novedades: cada vez que el juego se actualiza, al entrar te aparece un pergamino con todo lo nuevo. Y en el Devlog, cada versión en video.What's new: every time the game updates, a scroll with everything new greets you when you log in. And the Devlog has every version on video.
¿Algo que no está acá, o que no se entiende? Contanos en el Discord: la guía crece con lo que preguntan los jugadores.Something missing here, or unclear? Tell us on Discord: the guide grows with what players ask.
